Landon Morgan’s First Deer

Youth Hunting Success | Landon Morgan’s First Deer Hunt

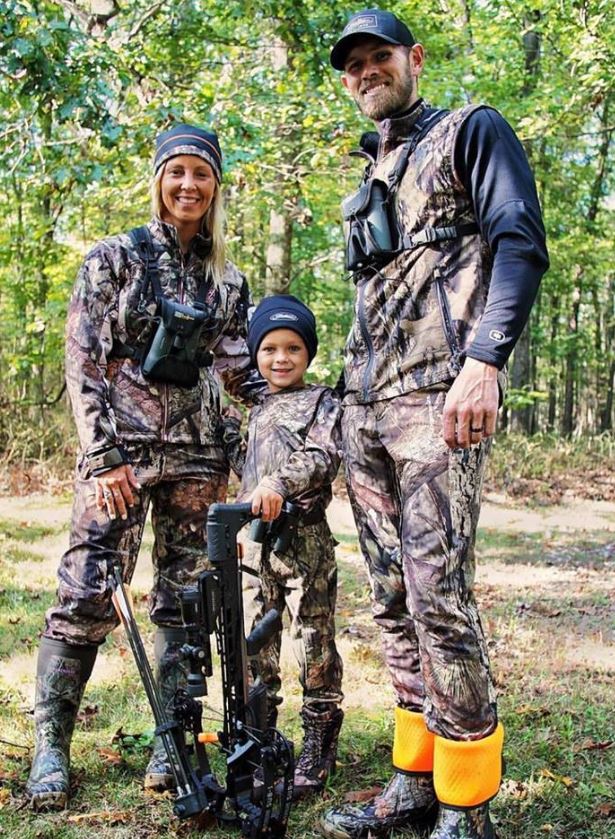
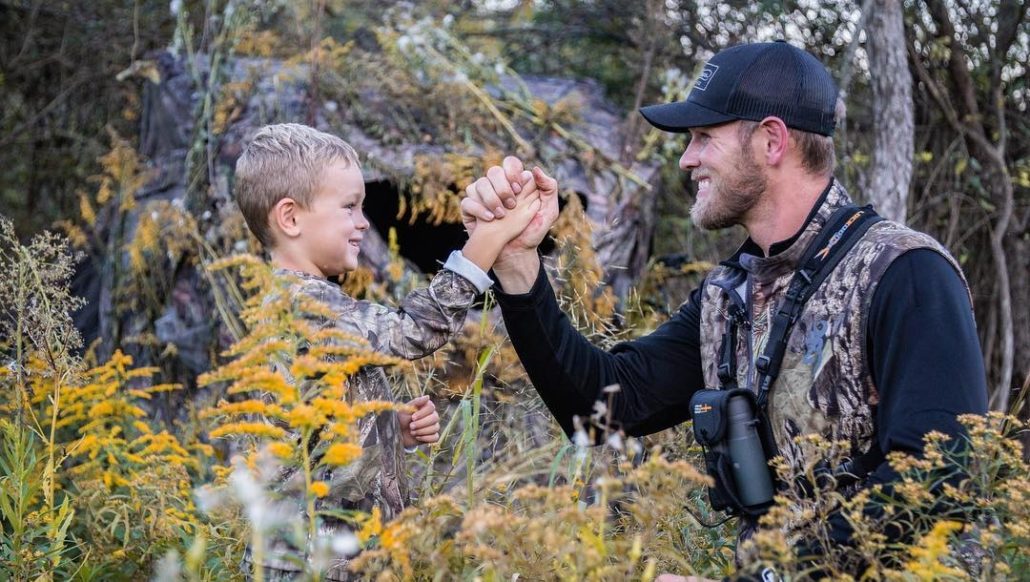
Isn’t it amazing how fast the years can pass by, especially when you’ve got kids at home? Add in work and a little play, and the years just seem to keep rolling by faster. But they say time flies when you’re having fun, so we must be having a lot of it. I sure had a lot of fun this week. It’s the beginning of the Pennsylvania deer hunting season, and our little man went on one of his first youth hunts this week. That is a time (as hunting parents) that you wait for from the day you find out you’re having a kid. Well, it finally happened, and we couldn’t be more excited for him. Here’s how his first youth hunt all unfolded.

As mentioned, we have been waiting for Landon to go on his first youth hunts for years now. At six years old, he is only able to hunt with an adult (a hunting mentor) right now in Pennsylvania. But he’s been practicing a lot with his Mission® crossbow and we were confident in his shooting abilities, so we felt like it was a good time for his first time hunting. That doesn’t mean we weren’t nervous about it – there’s a lot that could go wrong in any hunt, but especially with youth hunts. Even though we would be right there with him the whole time, there’s always that fear that he might not enjoy it or he might miss or wound a deer. Luckily, our situation didn’t play out that way, as you’ll see below. We were all able to go out and hunt for his first time as a family, which is a really amazing experience we were blessed to have.

For his first youth hunts, we set up one of our Ameristep® hunting blinds on a food plot behind the houseThe deer had been using it pretty steadily and the deer movement on our farm was consistent. We just hoped that one would come in and give Landon a chance to shoot one. Unfortunately, his first deer hunt didn’t come together that first night with all of us in the blind. I sat with Landon for another mentored deer hunt this week, and things went a little more according to plan. A nice doe came into range and Landon sat on my lap to get his crossbow ready. Check out the video below to see what absolute joy and excitement should look like in a child.

Of all the trophies, of all the big animals we’ve been blessed to take over our lives, nothing has ever meant so much to us as watching our little guy shoot his first deer. And from the way he reacted after the shot and walking up to the doe, it’s safe to say he was pretty excited by his first youth hunts. God is so good and we believe our little boy just fell in love with deer hunting. As hunting parents, there’s really not much that can top that feeling.

The Ethical Bow Hunting Shot

Bow Hunting Tips | Ethical Bow Hunting Shots

Hunting is not a right, but a privilege and one that hunters must protect by hunting and shooting responsibly. The harvesting of game means the taking of a life and that must be done swiftly and as humanely as possible. The shot must be accurate, properly placed and ethically taken.

A bow has no shocking power when it comes to large game. Death comes by hemorrhage inflicted by a sharp broadhead. Fortunately there are numerous excellent broadheads on the market today from which to choose. Buy the best broadhead you can afford and ALWAYS hunt with a new sharp head or one that you have sharpened to a razor’s edge. A dull broadhead will definitely kill but will greatly minimize the blood trail and increase the chances of the animal suffering a lingering death often going unrecovered by the hunter. This and the angle or distance of the shot is obvious to any hunter but often forgotten in the heat of the moment. So what is the best way to ensure you take an ethical bow hunting shot?


Preparation

ALWAYS sight-in your bow or crossbow using the broadheads with which you intend to hunt. Broadheads often fly differently than field tips even if the weights are identical. Weight is not the only consideration as it is the aerodynamics of the head that has the greatest impact on an arrows flight.

When hunting with bow or crossbow shot placement is the key to success. That means ensuring equipment is properly matched and tuned to produce the best flying and most accurate arrows possible. It is the hunter’s responsibility to ensure they can deliver the shot where it will inflict a quick and humane death.

Not being competent with the weapon with which they are hunting with is by far the most common mistake made by hunters. Standing at a known distance on level ground on a warm summer day and being able to put four out of six arrows in the bull’s-eye is not being ready to hunt. Hunting shots happen in all weather conditions and in all terrain. If you intend to hunt from a tree stand practice from a tree stand. If you intend to hunt from a ground blind practice sitting on a stool or chair or kneeling. Practice random shots from various distances and if you sighted your crossbow in from a bench rest, practice shooting it offhand. Watch where your first shot of any practice session hits. There are no warm-up shots when you are hunting. Strive to make your first shot count under any conditions. No warm up shots, no getting adjusted. Practice random shots until your first shot hits the mark consistently.

Bow hunting is not horse shoes, close does not count. When practicing do not shoot at the whole target but learn to pick a spot and aim deliberately. When hunting do the same thing. After you have an animal in range concentrate on the spot you want to hit. Don’t be distracted by anything including the size of the rack if it is a buck. Focus entirely on the spot on the animal you want to hit. Try to pick out a tuff of hair or a slight change in color or a shadow behind the front leg, anything to focus your attention on. Remember if you aim small you will miss small.

Always practice from a longer range then you intend to hunt. Long range practice helps define your form and makes shorter shots easier to make. It is a good rule of thumb to practice at twice the distance you intend to shoot when hunting. As the average bow hunting shot for whitetail is approximately 20 yards practice to hit a 6 inch circle at 40 yards. You may not be able to hit the six inch spot every time from 40 yards but you will not believe how easy a shot that presents itself at 20 yards or less when hunting will seem. As a general rule of thumb both vertical bow and crossbow shooters should not take any shot at any distance further than you can keep your arrows consistently inside a six inch circle.

While practice before season is important practice during the season is equally as important. Take a few minutes each day or every other day to shoot 6 to 12 arrows to keep you form consistent and your muscles loose keeping you in top form when a shot presents itself. 

Killing Shots

When it comes to taking a shot at a game animal with a bow the object is not just to hit the animal but to place a killing shot within the heart lung area, the largest collection of major blood vessels in the animal’s body. Seek out reference material on-line or in the library showing the internal organ structure of the whitetail deer or other big game being sought to identify exactly where to place your arrow. Note heavy bone structure which should be avoided as it can deflect an arrow and greatly reduce penetration if struck.

Once you have an animal within your shooting range the next major consideration is the angle of the shot. The ideal shot with a bow is at a deer slightly quartering away from the shooter. This angle allows the arrow to enter the soft rib/belly section and angle forward into the heart lung area. While broadside shots are certainly desirable, watch the position of the deer’s front leg on the side toward you. Proper arrow placement is just behind the front leg. If the deer is slowly walking or feeding their front leg at times will be pointing rearward covering the ideal shot location with the shoulder blade and leg bone. Wait for the leg to be in a forward position before triggering the shot. Shots with a deer facing directly at you or directly away should be avoided. Both shots although, they can be deadly, often result in poor penetration without an exit wound, a poor blood trail and often a lost dead deer. While the neck shot is a favorite of some rifle hunters it is not well suited for a bow and should be avoided. While a hit in the spine will put the deer down that is a very small target to deliberately shoot for. A deer struck in the neck with an arrow is often lost.

Shot Timing

The art of bow hunting is about getting close, being properly concealed and remaining patient enough to get not only a shot, but the best shot. A deer moving through a given area or feeding is normally alert but relaxed. Deer are always checking their areas for sign of danger and are ready to flee in a split second. However if they are not aware of your presence they will normally offer you a killing shot if you are patient. When hunting deer with a bow things change every second. It is important to gain the experience to know when to shoot and when to wait. The only way to learn that is to spend as much time in the field as possible, be ready to take the shot and skilled enough and focused enough to place the arrow in the right spot. To shoot any sooner is to risk making a poor hit and losing and wasting a valuable animal. It is important as a bow hunter to have the discipline to pass up a poor shot and wait for a better opportunity. To do any less is not only irresponsible, it is unethical and it is threat to the sport of bow hunting.

Anyone can have a bad hit. Unfortunately it happens to the best and most experienced bow hunters. However it is the responsibility of each of us as bow hunters to avoid bad shots at all cost, to teach young bow hunters to be disciplined and ethical and to learn tracking skills and made every attempt to recover hit game. There is now excuse for anything less.

Situational Dependent Shot Placement and Tips

The next 9 shots are some every bow hunter will encounter at some point, it’s up to you on whether or not to shoot or where you will place the arrow.

#1 Straight on Chest Shot

The buck is walking towards you and will wind you before turning. While this shot looks like a bow hunters dream it can quickly turn into a nightmare. The chest area is covered with heavy muscle and bone which could limit penetration and the chances of an exit hole is greatly diminished. A better shot will present itself as the deer passes by or turns slightly.

Advice: Wait it out. It’s not worth risking the shot and you might be offered a better shot at any moment or on a different hunt.


#2 Neck Shots

Let’s say the deer’s vitals are covered up by a tree, and the only thing showing is the neck. Do you shoot? Neck shots such as this can be very tempting but unless the spine is penetrated the deer will surly run off only to go down some distance away and may not succumb to the wound for several days. The blood trail will be minimum and chances of recovery slim.

Advice: Wait it out. This deer will either step into view shortly presenting a shot or turn and walk away for another day and another opportunity. 


#3 Feeding, Shoulder Back Shot

The target is feeding in a food plot or drinking from a waterhole, with the shoulder back covering a good portion of the vitals. While this deer offers what seems like an excellent opportunity note the position of the front leg. Feeding deer, or any other game often position one of the front legs to the rear position, meaning heavy leg bones and the shoulder blade are covering part of the heart lung area.

Advice: Wait for the deer to put the left leg forward and you will have an unobstructed shot into the heart lung area for an almost certain kill.


#4 Deer at a Scrape

A common situation you may encounter, especially during October and November, may be a buck standing at or making a scrape. If the deer is perpendicular to you it can offer a great shot. Situations such as this mean that these bucks are preoccupied making a scrape offer an open lane to their vitals.

Advice: Let it fly!


#5 Walking/Running Away Shot

The game is up, the deer or other game animal is facing away and walking/running out of your bow range. This is a no shoot situation. Trying to get an arrow through the back end of the animal is very difficult if not impossible.

Advice: Wait it out. Deer, elk, pronghorn or any other game animal walking/running away unless you have spooked them completely can and often will turn quartering away to figure out what spooked them. At any moment you might be offered a quartering away shot on the edge of your effective bow hunting range.


#6 Quartering Away Shot

The target has turned slightly to look back at you, or has followed a run leading away from your location that offers a quartering angle. While the angle on this shot is desirable the target might be alert meaning it could bolt at the slightest sound or movement. If the target is not alert take time to study the angle and the position of the vitals. This slightly forward angled shot is ideal as it allows the arrow to enter the softer tissue and muscle behind the shoulder as the arrow angles forward into the heart lung area. The arrow should exit in front of the far front leg creating an exit wound providing a good blood trail.

Advice: The best decision would be to not shoot on a quartering away and alert target. If the target is not alert and offers an angle that allows an arrow to be placed in the vital area, let it fly.


#7 The Perfect Broadside Shot

If the target is perfectly broadside top your position you have essentially the perfect shot. If the target is focused away from the hunter and not on alert you are in the clear. However if the target is on alert by the posture you may want to wait or place the arrow lower than usual allowing for a vital hit whether they jump the string or stand still.

Advice: Shoot.


#8 Quartering To Shot

The target is quartering to you, and will hit your wind if it continues on the current route. The angle on this target makes it difficult to get a shot into the heart lung area with busting through heavy leg bones, shoulder blades, and heave muscle. However, if the target is moving past the hunter and not downwind you could be offered a broadside shot.

Advice: since the target vision is in your direction or could catch your draw, draw slowly and wait for the broadside shot that will shortly present itself. If you don’t get this and the target will pass downwind you should wait it out. Your wind might cause panic, allowing the target to present a broadside or quartering away shot.


#9 Straight Down Shot

For tree stand bow hunters, a straight down shot on a deer is a hard shot. Besides challenging the use of you bow sight, the vitals are selective. You either hit one lung, or one lung and the heart. If the angle is slight it could be a great shot, but straight down often results in sounded deer.

Advice: Wait it out. This target will offer a great opportunity for the majority of situations since any route it takes creates a better angle for a shot out of a tree stand.

Take your time, know your limits, and study shot placement and situations. Being prepared before you hunt and are presented shot opportunities is your best chance at always being a responsible and ethical bow hunter.

2018 Browning Strike Force | Trail Camera Review

2018 Browning Strike Force Pro XD Trail Camera Review

Trail cameras have become the cornerstone to every hunter’s scouting game.  Their invention has allowed hunters to learn greater detail about their game, adjust their plan accordingly, and simply hunt more efficiently. This has led to improved success across the board.  Every hunter can benefit from the data they gain from a trail camera. However, just like with any technology, not every trail camera is created equally.

When deciding on the right trail camera; numerous features need to be considered.  These include:

  • Photo Quality 
  • Video Quality 
  • Night Quality 
  • Memory Capability 
  • Ease of Setup 
  • Battery Life 
  • Convenience 
  • Portability 
  • Affordability 

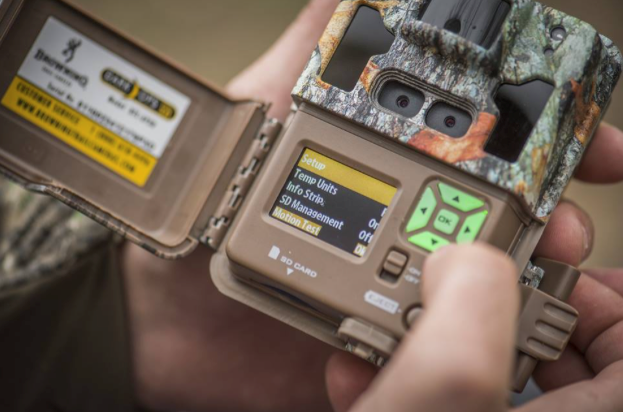
Of course, one of the leaders in these technologies is Browning.  This year, they knocked it out of the park with their entire lineup of cameras. One of the favorites for this year’s lineup is the Strike Force Pro XD. It’s a feature-rich, incredibly affordable trail camera option for the avid hunter. It features dual lenses, fast response times, high quality images and video while still staying compact and portable. However, one of best advancements is in its night capabilities.

Design

Although not the most compact of the Browning line-up, it’s still comes as a very portable package. The camera is sized at 4.25” X 3.75” X 3.25”.  It’s also easy to mount with a built in steal adjustable metal bracket and mounting strap.  It comes in Mossy Oak camo where it blends into nearly any environment it will be mounted in.  However, the design doesn’t stop there. Many of its major design features also includes: 

  • built in viewing screen 
  • dual lenses 
  • IR flash 
  • expandable SD storage 
  • 12V external jack 

It’s an absolutely loaded design that has managed to stay compact while keeping an affordable price.

Photo and Video Quality

The Browning Strike Force Pro XD has incredible lens features. It comes with dual lens. One designated for day and one for night. It has one for day and one for night. 

It also includes a 24-megapixel camera, complete with a .15 second trigger speed and .5 second recovery time. It’s motion detection can reach up to eighty feet; allowing you to capture plenty of action farther out from the camera. When movement is detected; there is only a .15 second wait until the image is captured.  It’s fast recovery time also assures you’ll get numerous photos of the same deer if desirable. 

As for video, it shoots in full 1080 HD and of course includes sound.  The upgrade in video quality is impressive especially when combined with its ability to take longer length videos (up to two minutes). This allows plenty of time to capture any intriguing moments while keeping it easy to manage and power efficient. 

However, it’s most striking improvement is in its night time performance.  It’s night time designated lens, in combination with its red glow IR flash, allows for stunning footage in low light conditions. Not to mention, it’s 120-foot flash range is impressive; allowing users to have a crisp view of overnight activity at a distance. The IR flash range is also adjustable, including a power save, long range, and fast motion mode.

Power

Power is an important, but highly over looked, feature of trail cameras.  At this point in technology, cameras should be incredibly efficient, lasting months in the field without any hassle.

This type of power efficiency is necessary for two main reasons: 

  • To keep a spot from being disturbed through excess activity and scent 
  • To assure valuable photos and video are not lost due to power failure 

When power does run out, their choice of batteries should also be easy to buy, affordable, and have excellent duration.

Additionally, for hunters who live a long distance away from the property, they can rest assured that the camera will still be operating weeks or months after it’s been mounted.

Therefore, finding a camera that has long lasting battery life and won’t break the bank when it needs replacing is crucial to overall camera quality. The Strike Force Pro XD trail camera has exceptional power efficiency while only needing AA batteries to operate.

In fact, it works on six AA batteries; which are both easy to purchase and affordable. Battery lifespan is highly variable based on the demand a user puts on the camera.  However, one source cited that if the camera took only 35-day and 35-night photos every 24 hours; it would last 10.3 months without needing replacement.  Considering the improvements in photo quality and features, that’s an impressive number.

Memory Capability

Another important component to consider when purchasing a trail camera is SD card storage.  The longevity of the battery only matters if there is enough storage capacity to handle the data.  Not to mention, nothing is worse than checking a camera and realizing it ran out of storage two weeks ago (or that it copied over the first two weeks of images!). Therefore, what is the solution to this? It’s finding a camera that has expandable storage.

The Browning Strike Force Pro XD provides just that.  Not only does it allow for expanded SD storage up to 512GB (which is quite a lot of space I may add) but it also allows for on device memory card management. This means you can save and erase files right on the spot.  This is incredibly convenient when you need to clear space on a whim.

Ease of Use

The Strike Force XD’s 1.5” color view screen and simple keypad helps make programmable adjustments a breeze.  The keypad is well lit for lowlight conditions and the design is easy to use.  The camera has an easy to find SD card reader slot to hold its cards (ranging up to 512 mb in size).
This well design camera makes viewing and managing photos on the spot a breeze.

One of the Best Cameras for 2018

The Browning Strike Force Pro XD is a feature rich device that will be hard to beat for 2018.  

It provides incredible day and night picture quality, HD video, efficient power, expandable storage, that all fits in a well-designed container.

Additional settings include rapid fire images, multi shot images, time lapse mode, programmable picture delay, and more. It’s compact size, vast features, and exceptional photo quality makes it an incredible bargain.

Coming in at only $199 it’s going to be hard to beat.

“Archery Fit” Archery Tips | Single Versus Multi Pin Bow Sights

Single Versus Multi Pin Bow Sights

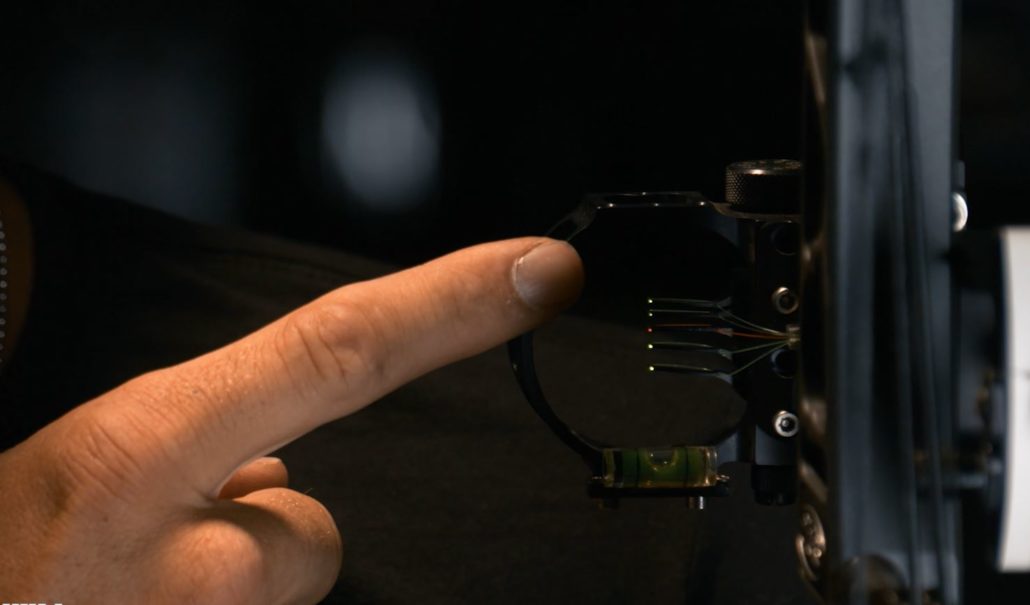
Today’s selection of bow sight options offers the bow hunter the ability to select just the right sight for their needs. When selecting a bow sight it is best to use a step by step process based on the intended purpose and end use. The first decision is for what purpose is the sight intended, hunting or target? As we are focused on hunting bow sights in this discussion the next consideration is, “What is being hunted and under what conditions?

Single Pin vs. Multi Pin

Hunting sights are available in single moveable pin and fixed multiple pin models. Single pin sights are often preferred by hunters who find multiple pin sights confusing or with archers who are also dedicated target shooters and are simply more comfortable with a single pin sight. A single pin sight has the advantage of offering the shooter a single point of focus during the shot. The disadvantage is that the sight must be set for a specific distance before the shot and under hunting conditions that can and often does quickly change. Setting or changing the sight setting requires an extra step in the shot sequence. Once game is spotted the distance must be determined by mental calculation, pre-ranged-in markers or the use of a range finder, all of which require time and movement before taking the shot. When using a multiple pin sight for which the distances have been sighted in it is a simple matter of selecting the right sight pin for the distance and holding accordingly. Sounds simple but there are more considerations when choosing a multiple pin sight.

Eastern bow hunters targeting mainly whitetail deer will find the majority of their shots at ranges under 30 yards in wooded conditions. The average shot is normally under 25 yards with shots not uncommon at 15 to 20 yards. Western hunters find entirely different conditions when hunting deer and elk in open country where shots of up to 70 yards can present themselves. 

When it comes to selecting a multiple pin sight consideration should be given to the number of pins required to meet the needs most efficiently. The final number of pins selected is determined by both the game being hunted and the equipment being used. The flatter the bow and arrow combination shoots the closer the pin gaps will be. Therefore a slower bow will use more pins to cover a specific distance range as opposed to a faster set-up that may use less pins. The object is to use all the pins that are required but the least number of pins to get the job done. Multiple pin sights are available with from two to seven pins so it is easy to find the right sight to fit any need. Pins can be removed or added if required for a truly custom set-up.

Pin Size

A major consideration when selecting a sight is pin size. Most manufacturers offer a variety of pin diameters with the most common sizes being .010, .019 and .029 inches in diameter. While most archers tend to select smaller pins, larger pins have a definite advantage that should be considered. First is eyesight of the shooter. Eyesight ends to reduce as people age and the changes are often so small it is hard to detect. However small sight pins can get blurry and may even tend to be hard to differentiate when set close together. Hunting shots often present themselves in early morning or late afternoon when the light quality can be poor. Struggling to see the sight pins can make the shot more difficult. Smaller pins cover less of the target and it is often thought that the smaller the sight pin the more accurate the sight. While this is true it must be considered under hunting conditions. A hunting sight is not intended for 10X accuracy and if the target is game as opposed to the X ring a larger sight pin may be the best overall choice. It is also common to outfit a bow sight with larger pin diameters for closer ranges and smaller pins for greater distances.

Mounting Bracket and Fiber Optic Options

Hunting sights also come with the option of different mounting brackets. While some sights mount directly to the bow with a short compact bracket others offer extended mounting bars which allow the shooter to adjust the sights distance from the bow. While both work well the extended sight bar has some advantages to consider. The greater the distance between the string peep and the sight pin the greater the accuracy. The major advantage of a movable sight bar however is one seldom considered. Most sights have a round pin guard designed to protect the sight pins from damage. While many shooters attempt to center each pin in the string peep a better method is to sight-in centering the outside diameter of the pin guard in the string peep. This allows the use of a larger peep sight which lets in more light making shots in low light conditions easier to make. Because the accuracy is still based on the centering of two objects, the inside of the string peep and outside of the sight pin guard the accuracy is actually increased. The movable sight bar makes this process easier as it allows the sight to be adjusted forward and back to make the round pin guard fit comfortably within the string peep regardless of size. This is a quick and easy way of obtaining excellent sight alignment with increased light gathering capabilities.

While all sight pins today are light gathering fiber optics the amount of light gathered varies with the amount of light gathering material exposed. For those seeking the ultimate brightness there are optional light systems that can be added to the sight. Some manufacturers even offer light adjustment features so the amount of light can be regulatedproviding control over the sight pins brightness. This is a desirable feature as in low light an overly bright pin can actually make the pin fuzzy or appear to have a halo making accurate sighting difficult. In bright light the sights pins might tend to blend in or fade and additional power to the light is desirable. In either case having the ability to regulate the brightness of the sight pin is a definite advantage.


“Archery Fit” Archery Tips | The Importance of a Square Nock End

 The Importance of a Square Nock End

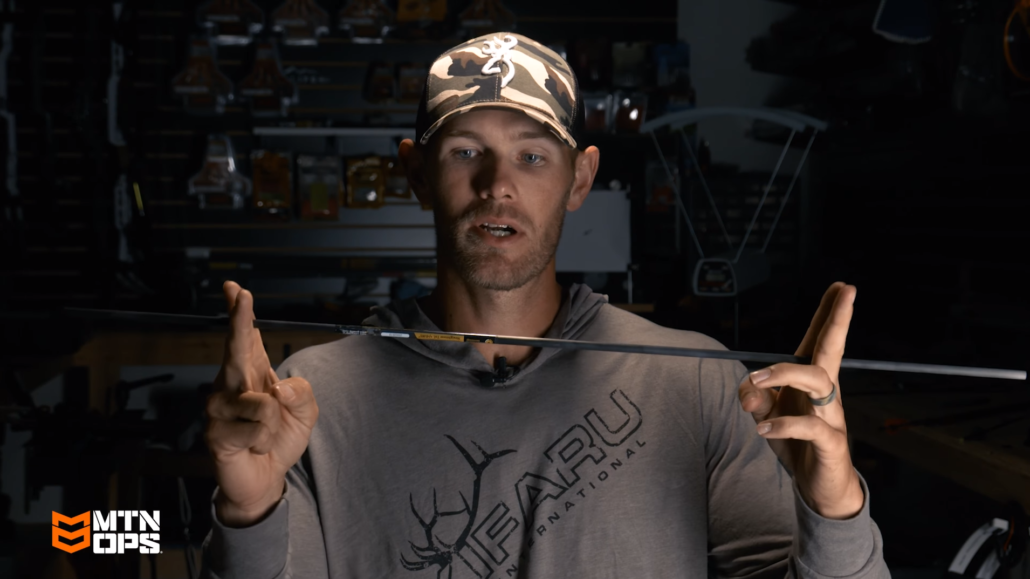
While today’s arrow shafts are extremely consistent compared to those manufactured just a few short years ago they are still a manufactured product and like any product subject to manufacturing tolerances. One of the advantages of fletching your own arrows is the fact that you have more control over the quality of the finished product and that starts with the simple step of making sure that both ends of the arrow are square and true to the center.

How Arrows Are Made

Aluminum arrows are normally produced though what is known as a “drawing process”. During this process, aluminum tubes are heated and “drawn” or pulled to obtain the desired outside and inside diameter which results in an arrow suited for a specific draw length and bow weight.

Carbon arrows, on the other hand, are commonly made by “wrapping” a carbon cloth to form the arrow. In either case, each method is designed to produce a product that is as uniform as possible throughout its length. However, simply due to the manufacturing process, the arrow is most consistent throughout the middle of its length than either end. That means that when cutting a 28 inch arrow out of a 32 inch bare shaft it makes the most sense to take it out of the middle and cut two inches off of each end of the arrow as opposed to four inches off of one end only. This cuts the finished arrow out of the most uniform and therefore most consistent portion of the bare shaft.

Cutting & Squaring Your Own Arrows

For those of you that have your own cut-off tools, this is a simple matter. However, if you have your shafts cut at a pro shop you will have to make your desires clear to the shop technician. It is common practice for most pro shops to simply trim the one end, if they do so at all, and take the excess shaft from the other end in one cut. There may be a slight charge for the extra cut but it is well worth the cost.

However, when the arrow is cut to length the job is not done, it is just starting. The next and most important step is the squaring of the arrow ends. A high quality cut-off saw will do a good job when cutting the arrow but the blades on a cut-off saw are thin and flexible and depending upon the amount of wear on the blade the cut can be a little “wavy”. Also depending upon the experience of the operator it is possible for the cut to be at a slight angle, not visible to the eye, if the shaft is not held tightly against the cut-off saw guides. Regardless of the reason it is important to square both ends of the shaft to ensure the quality of the finished product after the shaft has been cut to length.

All manufactured items are built to within a tolerance range of plus or minus. When you put together several items those tolerances add up so to maintain accuracy it is important to eliminate or minimize any potential tolerance build-up whenever possible. When inserting a target point or hunting insert into a shaft there are several tolerances to consider, first is the difference between the inside diameter of the arrow and the outside diameter of the insert plus the squareness of the insert shoulder and the squareness of the shaft end. For best possible overall alignment the better the shoulder of the insert and the end of the shaft fit together the closer the insert will be centered with the inside of the arrow and any point, field tip or broadhead will, therefore, be more closely in line with the center of the arrow. This difference may not be as noticeable with a field tip or target point but when mounting a broadhead which again has its own set of manufacturing tolerances the difference can be quite dramatic.

All of the same truths can also be applied to the nock end of the arrow. If the nock end is out of square it will not allow the nock to properly seat in the arrow when inserted. This condition, in turn, can force the nock to make contact to the side of the actual center of the arrow shaft. This difference may not be noticeable to the naked eye but it is definitely noticeable to the dynamic forces to which the bow and arrow are subjected when the string is released.

The instant the bow string is released the power stored in the bow limbs is transferred to the arrow through its contact with the string. That power transfer is transmitted through the nock and into the arrow shaft itself causing the forward motion of the shaft. It is important that this power transfer is done as smoothly as possible and also as centered as possible. The ideal and most efficient situation is to have the force concentrated on the center of the arrow shaft. If the force is applied off center it creates unequal pressure on the arrow during the shot and with each arrow being different if the ends are not squared this condition gives more variation shot to shot resulting in inconsistencies.

For an example suppose your truck was sitting on a piece of slick ice and was out of gas and you had three buddies who were going to help push you down the road. The ideal situation would be to have one at each corner of the truck and one pushing in the middle which would equally apply their force across the back of the truck. This would equally apply the force to the truck which would also be centered moving forward. Let’s suppose on the other hand that all three pushed from one corner of the truck. Their total applied force when applied off center would have a tendency to move the truck at an angle to the side. Their applied force would not be properly directed resulting in a waste of effort and lack of control or induced error. This same logic applies to the square end of an arrow. Making sure the nock end is square enables the nock to fit properly with the shaft and ensures the power transfer from the string is as close as straight down the middle as possible.

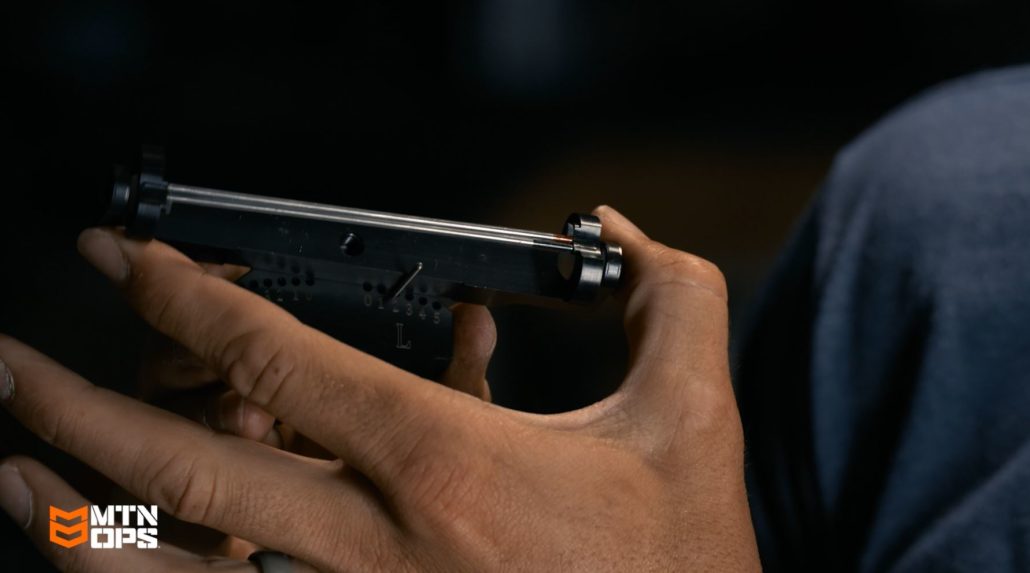
PHOTO: Squaring the ends of an arrow is the first step when it comes to ensuring perfect nock alignment to ensure proper transfer of power from the string to the arrow. Squaring the end of the arrow also provides better point alignment and broadhead flight. A squaring tool allows the squaring of both ends of bare shafts before fletching as well as the nock end of arrows already fletched.

Simply sanding the end of the shaft may make it smooth but it does not guarantee that it’s square. Squaring the shaft ends is simple, takes only seconds to do and is well worth the time and effort.). A Squaring tool is designed to square arrow ends to ensure the proper fit for activating  Nockturnal Lighted Nocks it is also ideal for squaring both ends of the arrow for the reasons described above. A squaring tool is a simple v-rest tool with a sand paper disk at one end against which the arrow end rest. A few simple turns of the arrow against the disk and any irregularities or high spots are quickly removed leaving a smooth flat square surface perpendicular to the center of the arrow. If you cut-off your own arrows having one of these tools makes the job complete. Ask your pro shop if they have one available for squaring your shafts if you have shafts cut there. If they do not provide that service consider making the investment yourself if you intend to build your own arrows.

Conclusion

Some shooters might ask, “Is all this really necessary, after all, does a little bit really matter?”. If you ever lost a tournament because one of your arrows is “just out a little bit” you would not ask that question. Every serious archer, be they a tournament shooter or a bow hunter should strive to be the best they can be. Success in both fields is often determined by fractions of an inch. With equipment and shooters today being highly focused on every aspect of their game there is little room at the top and often the second place is quite crowded. To be your best and stand above the crowd it is necessary to ensure your equipment is performing at its best and the place to start is with the squaring of your arrow ends.

“Archery Fit” Archery Tips | Fletching Arrows

Fletching Arrows | Fletching Jigs, Helical, and Offset Vanes

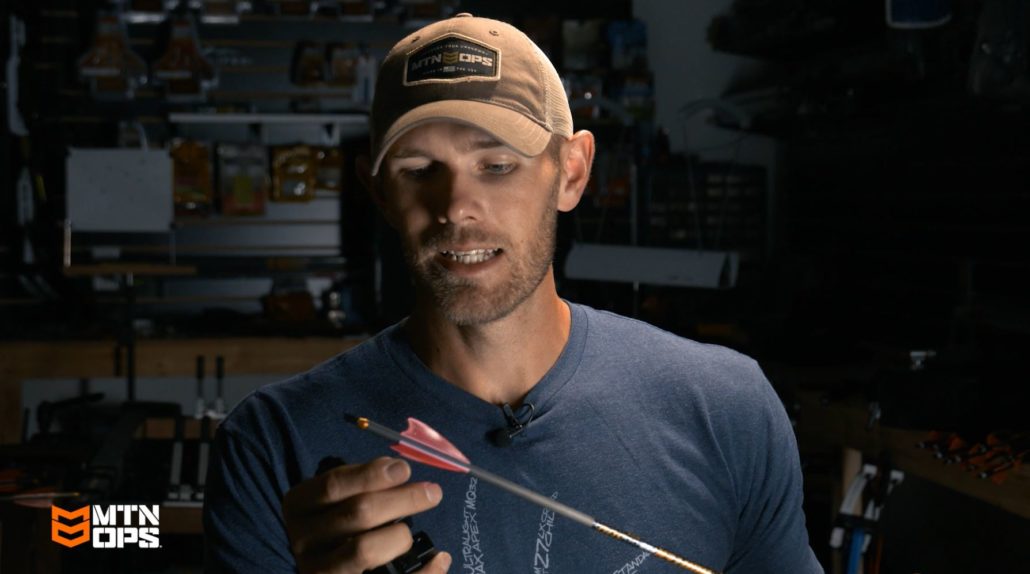
A direct comparisons can be made between a hand loaded rifle shell and an arrow when it comes to accuracy and group size. We all know rifle shooters who obsess over the combination of bullet weight, shape, design, amount of powerprimers, built-up pressures, trajectories, and various combinations of all when seeking the ultimate load for a particular rifleAn archer seeking the best arrow for a particular bow or a specific purpose follows much the same path and the ability to fletch and refletch arrows as required is an important part of the process. A growing number of archers understand the advantage of fletching their own arrows. While buying finished arrows is quick and convenient it does not allow for custom tuning and is like buying “factory ammo” off the shelf. It works but does it provide the greatest accuracy and smallest groups?

Anatomy of a Hunting Arrow

An arrow is made up of several basic components. The arrow shaft, point weight and design, nock and fletching. When selecting an arrow shaft there are several considerations, shaft weight, straightness, stiffness or spine and the tolerance to which each shaft is held. Obviously the tighter the tolerance the closer matched the arrows will be in a given set. When it comes to arrow spine some shafts have indication marks which if aligned when fletched will position the stiffest portion of the arrow in same direction to increase the consistency of each shot.

Point weight is dependent upon the end use. Heavier points are often preferred by hunters seeking large game to increase penetration. Heavy points are also used by target shooters when shooing long distances in windy conditions to minimize wind drift. Lighter points are favorites of archers desiring to achieve maximum arrow speed and flatten trajectory. Changing point weight also impacts the spine, (stiffness), of an arrow and can be used to make minor changes when tuning a bow. The addition or removal of weight to the point can stiffen or weaken an arrow shaft and also impact the arrows FOC, (Front of Center balance point). The addition of weight weakens the spine and the removal of weight makes the arrow tune stiffer.

Nocks which are the smallest but important component are selected on arrow type and string fit. A nock must be just snug enough to remain on the string during the draw but leave the string with minimum interference upon release. Most quality nocks have a slight, “snap-on, feature which satisfies both requirements nicely. For most hunting arrows, most hunters also seek lighted nocks that cover these requirements.

Fletching

When it comes to fletching there are numerous styles on the market from which to choose. At one time natural turkey feathers were the accepted fletch and while they had the advantage of forgiveness when crossing the rest they were inconsistent in weight and thickness and did not perform well in wet weather. Feathers are still popular today especially among traditional shooter and in some cases indoor shooters looking for ultimate forgiveness or shooters desiring a large stabilizing fletch. Feathers were an important part of archery’s history and will always remain so but today’s plastic vanes control the largest market share. In addition to being weather resistant and much more durable then feathers, vanes are also consistent in shape, thickness and weight. These characteristic have greatly increased the ability of the archer to produce more closely matched arrows and tighter groups.

Vanes are available in a variety of shapes and lengths which offers the archer numerous options when selecting the vanes that will produce the tightest groups. In addition and equally if not more important is the angle at which the vane or fletch is applied to the arrow shaft. That angle can be varied from right to left with anything in between a slight offset to a hard helical. Fletch angle is directly associated with arrow spin and stabilization. The harder the angle and more helix applied the greater the generated spin which increases stability to a degree but which can also reduce speed impacting trajectory at long ranges. Fletch angle is a series of trade-offs and experimentation is required to determine what works best for what purpose.

All of these options are available to the archer that chooses to fletch their own arrows and it offers not only convenience but the ability to experiment with the combination of arrow components that produces the best results for the intended purpose.

An arrow set-up for indoor shooting is often different than an arrow set up for 3D or one set-up for long range target shooting. The same is true with hunting needs. A broadhead tipped arrow that is perfect for hunting whitetail at under 35 yards is different than the best arrow set-up for elk or caribou where a 65 yards shot is common. Could one arrow work for the various aforementioned examples? The answer is definitely yes, but that does not mean that one arrow is the best for all situations. The easiest way to find the best arrow for your specific set-up is fletch your own arrows which gives you the ability to experiment with different components to find the best arrow for your intended purpose. Fletching your own arrows gives the archer the same ability as the hand-loading rife shooter to find the best load for a particular rifle and purpose.

Whether you are interested in fletching your own arrows for convenience or in order to fine tune your set up it is basically simple and requires only a few tools the main one of which is a fletching jib. Fletching jigs come in various price ranges and designs. Some jigs fletch one fletch at a time while others can do three fletch at once. Actually the number of fletches applied should be the least consideration. When selecting a fletching jig it is important to select one that is easy to use and is accurate allowing the user to install each fletch in exactly the desired position and to repeat that for each vane including one that might have to be replaced in the future. This eliminates the need to strip all the vanes from any arrow requiring repair.

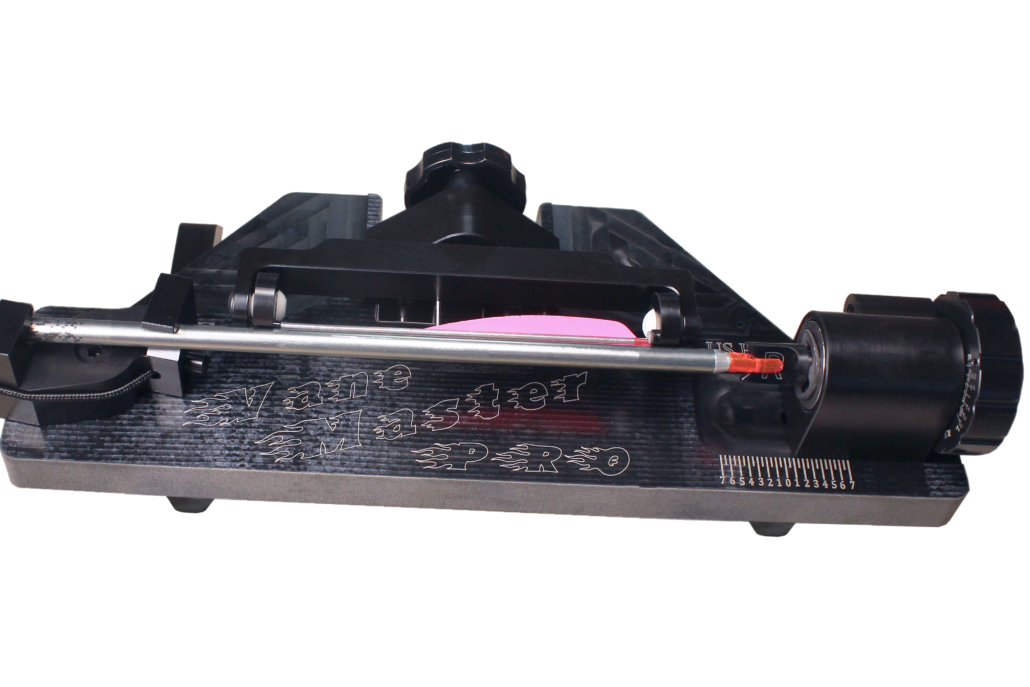
PHOTO: The Vane Master Pro, (VMP), fletching jig from Last Chance Archery is simple, flexible and easy to use. It is also extremely precise allowing for the accurate placement of vanes in any desired configuration.

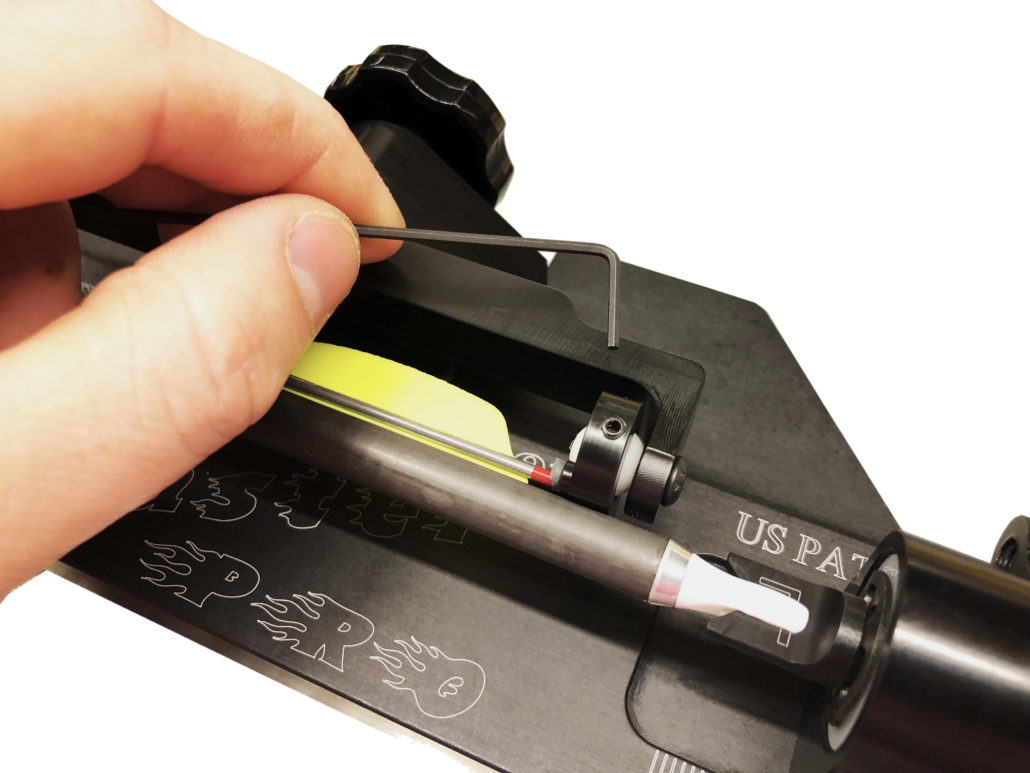
One of the most accurate and versatile fletching jigs on the market today is the Vane Master Pro, (VMP), fletching jig from Last Chance Archery. The all-new Vane Master Pro is an innovative tool made to provide perfection and consistency when fletching arrow to arrow. The VMP is designed to accommodate every arrow size with little or no adjustment. Arrows can be fletched at 0-5 degree helical, left or right, with the ability to hold vanes up to 4 inches in length. This jig has the ability to fletch 3 or 4 fletch configurations (4 fletch knob sold separately) while using Vane Flat Technology. Vane Flat Technology uses two wires to hold the vane, allowing  the clamp to perfectly contour around the shaft, for perfect vane adhesion every time. Aoptional  crossbow adaptor has recently been added to the line-up which allows the VMP to be used to fletch crossbow arrows regardless of the style nock used.  Last Chance Archery has upgraded its three fletch, or 120 degree knob for its VMP fletching jig. Not only can you now fletch 120 degrees spaced vanes while aligning your nock with your cock vane up, but you can also fletch 120 degrees and have your cock vane align at 90 degrees for recurve shooting or for those utilizing a rest requiring this nock positioning. This knob is standard on all new VMP jigs and is also available as a retro fit for older models. 

PHOTO: The VMP utilizes flexible wires to hold the vanes in the proper position during the fletching process. These flexible wires allow the vane to easily contour to the shaft surface regardless of shaft diameter and desired angle of vane ensuring accurate placement and maximum adhesion between the vane and shaft..

A precision tool like the VMP allows the archer to easily try different shapes and angles of vanes to determine which combinations produce the tightest groups as well as perform accurate vane replacement when required.

The choice in vanes is almost staggering with new ones being introduced continuously. While in some ways today’s vanes appear similar to the ones introduced years ago, the changes have been dramatic. Today’s vanes offer new technical shapes specifically designed to provide sufficient guidance and quick arrow correction with minimum drag. The material itself has greatly improved and now posses better memory avoiding vane distortion from pass-troughs. Today’s colors are widely varied and highly visible allowing for individual creativity for those with a flair for fashion. Recon Archery Products will be introducing a line of vanes shortly which will incorporate these features in a new highly efficient performance vane.

For those new to fletching the best advice is to pay attention to the fletching directions included with their shafts or vanes. Make sure shafts and vanes are clean before fletching, closely follow cleaning directions and use the recommended adhesive for trouble-free results.

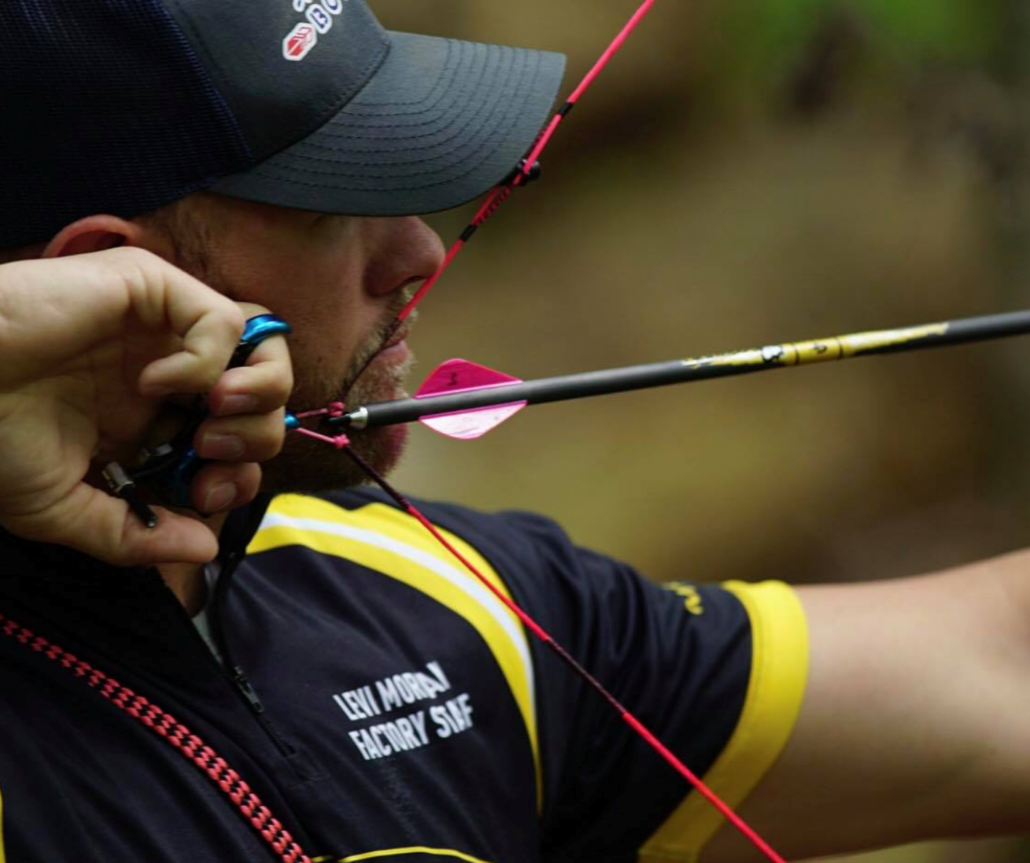
Photo: Levi Morgan shoots arrows with fletching that has a 2 degree offset as he shoots long distance most of the time. Unless you are shooting a light arrow it is hard to put a lot of helical or offset to arrows as once the arrow gets passed 50- 60 yards it begins to over control the arrow. This is called the arrow parachute effect, essentially the back of the arrow slows creating an arrow that has decreased accuracy.

Fletching arrows yourself allows you to control the end quality of your arrow as well as try different combinations of vanes, shafts, points and nocks to develop the best finished arrow for your intended purpose, tightening your groups, putting more points on your score card and bigger trophies on your wall. It is definitely worth the extra effort.


Archery Fit Archery Tips | Centering Nocking

Center Nocking and Tuning a New Bow

Setting up a new bow is always a challenge and can at times be frustrating. The best approach is to make the process as simple as possible and minimize the frustration by developing a step by step procedure to use as a guide.

Tuning a New Bow

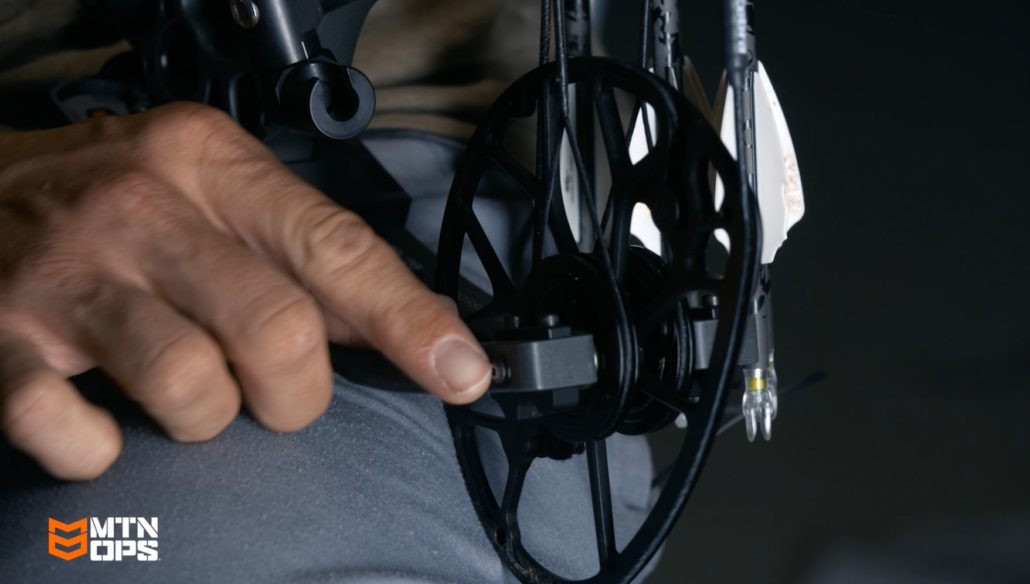
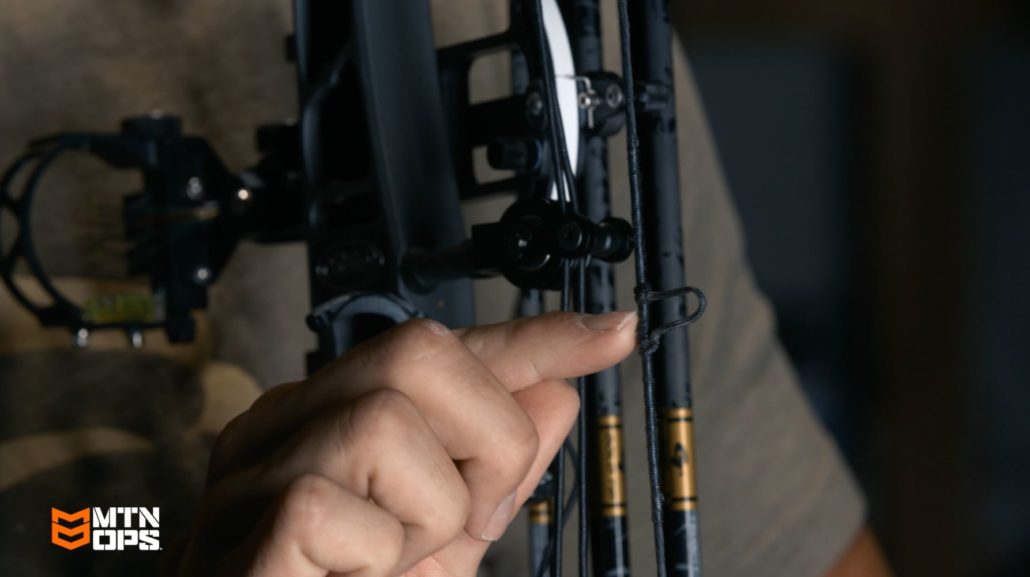
The first step is to adjust a new bow to the desired draw weight and draw length plus properly timing the cams. Once that is accomplished the next important step in the process is the centering of the nocking point between the axles of the bow. This is simply done by measuring the distance between the axles and using the midpoint to locate the position of the physical nocking point. This is the initial step in what can be a prolonged tuning procedure but it is the best place to start as it develops a base around which the remainder of the process centers.  The nocking point and the horizontal position of the arrow rest are at the heart of a well tuned bow. By centering the initial nocking point between the bows axles and adjusting the arrow rest accordingly with the string splitting the arrow when viewed from the string side it puts you in the ball park. (Note: The horizontal position of the arrow rest indicated is for a release shooter. Finger shooters may find the point of their arrow laying slightly outside the string when viewed from the string.) This now becomes the basis for the tuning procedure.

Ultimately bow tuning is a series of adjustments followed by trial and error. There is no one size fits all. Everything you do, touch, or adjust when tuning a bow does not act by itself alone. It is combined with the entire bow and you as the shooter. So when you make a slight change to the nocking point you could find you may also have to make a slight correction to the position of the arrow rest which in turn could require another very slight adjustment to the nocking point. This is not meant to be confusing or intimidating but to stress that tuning a bow is a series of steps each of which brings the bow closer to a perfect tune. Centering the nocking point between the axles helps minimize the number of steps and changes required as it puts you closest to what will be the final position for the nocking point. It also helps minimize the total number of steps required in the tuning procedure which makes it a very logical first step.

The results of a perfectly tuned bow should be a bow/arrow set-up that hopefully produces perfect arrow flight but also a set-up that not only shoots well but one that is forgiving and minimizes shooter errors.


Shooting machines eliminate the human element and therefore human error. They are excellent for the testing of new products such as arrow rests, stabilizers, different styles and fletching shapes, broadhead flight, and a whole host of other tests that have led to some major advancements in archery technology. In addition they are capable of shooting exceptional groups and can clearly show the difference in arrow spine and fletching combinations. They also can produce excellent groups from an outoftune bow because the “machine”, unlike a human archer shoots every arrow exactly the same. An archer should strive for a bow that is tuned for not only the mechanical components, bow, arrow, rest etc. but for the archers form as well. The ultimate bow is one that minimizes human error as much as possible and allows what should have been a 10X to be a 10 if form is not perfect instead of a nine or even an eight. 

Bow Tuning Methods

There are numerous methods used for bow tuning from the bare shaft test to paper tuning and all can produce excellent results.  All involve a series of shots followed by recommended adjustments and retesting. When using the method of centering your nocking point between the axles of the bow physically it may not be necessary to move your actual nocking point if the tuning method you are using suggest to do so. Moving the arrow rest vertically will accomplish the same desired result. Raising the rest actually lowers the nocking point while lowering the rest raises the nocking point all while keeping the nocking point centered between the axles. It is also important to note that effective changes can be made when using certain arrow rests without actually changing the rests physical position. When using an arrow rest with an adjustable spring tension, tightening the spring tension will act the same as raising the rest while weakening the spring has the opposite effect. When using a springboard or lizard tongue style rest, changing the thickness of the rest will act in the same way. A stiffer, (or thicker), launcher acts the same as lowering the nocking point and a thinner, (or weaker), launcher acts the same as if the nocking point was raised. 

Normally when making adjustments most archers simply reshoot the bare shafts or perform another paper tear test. This is fine, but adding another “group test” after each adjustment is highly recommended. Sometime the smallest change will change the size and shape of the group produced.  Make up a series of simple targets with the same size aiming dot. Fire four to six arrows at the same distance after each adjustment. Number each target and record the measurement of each group overall noting anything unusual. Note on each target the adjustments made and number the targets in order of sequence. As the groups grow tighter repeat the shooting part of the test from longer ranges again noting conditions and changes. Observe your targets for the tightest groups overall over a series of shots. The tightest groups will also be from the most forgiving set-up for your shooting style. That now becomes the ultimate set-up for that bow.

Once you are done with the tuning process record everything. Note the vertical and horizontal position of the arrow rest, the height of your peep from the nocking point, the distance between axles etc. This is valuable information if in the future you have an equipment failure or as a reference guide when you go to set up your next new bow.

When shooting different bow models and different bow manufacturers pay particular attention to the ones that “feel” the best. All modern bows are basically good shooters but some bows will fit your shooting style better than others. Many shooters think they can buy accuracy by spending more money but accuracy comes from shooting, shooting and more shooting. When you have enough shooting experience you can actually feel the difference between different bows. When selecting your next bow don’t immediately spring for the most expensive one but instead go for the one that “feels the best”.

10 Shooting Details to Focus on Improving this Summer

Archery Tips | 10 Things To Work On This Summer

With warmer temperatures and longer days, summer is the ideal time to focus on some of the finer details of your archery shooting performance. Summer bow practice is common place for any bow hunter, but focusing on specific details could drastically improve your performance. From refining your thought process to improving your breathing, details lead to being a more consistent archer. For this archery tips blog, Samantha and I outline 10 shooting details you should focus on during your summer bow practice.

1. Shooting Stance

This is a great time to focus on your shooting stance. Any variations in your stance will cause variations in your shot. When you are in that high-pressure moment of shooting a deer, it’s crucial that your stance is instinctive, and the best way to do that is to consciously practice it this summer.

I recommend opening your stance up. Many archers close themselves off from the target, which forces them to turn their head into an uncomfortable position. Instead, keep your stance open enough allowing you to feel more comfortable.

I also recommend keeping your feet shoulder length apart and toes pointed slightly out. Keep in mind, the most important aspect is what feels most comfortable to you.

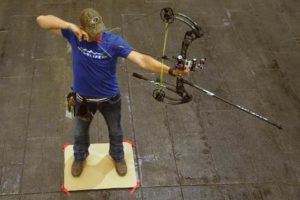
Once you find a comfortable stance, have someone trace your feet. Then, leave everything set up in its exact position and practice from this mark consistently. Before long, this will become a repeatable stance when practicing and on the stand.

You can read more details on my archery stance tips here.

2. Bow Anchoring

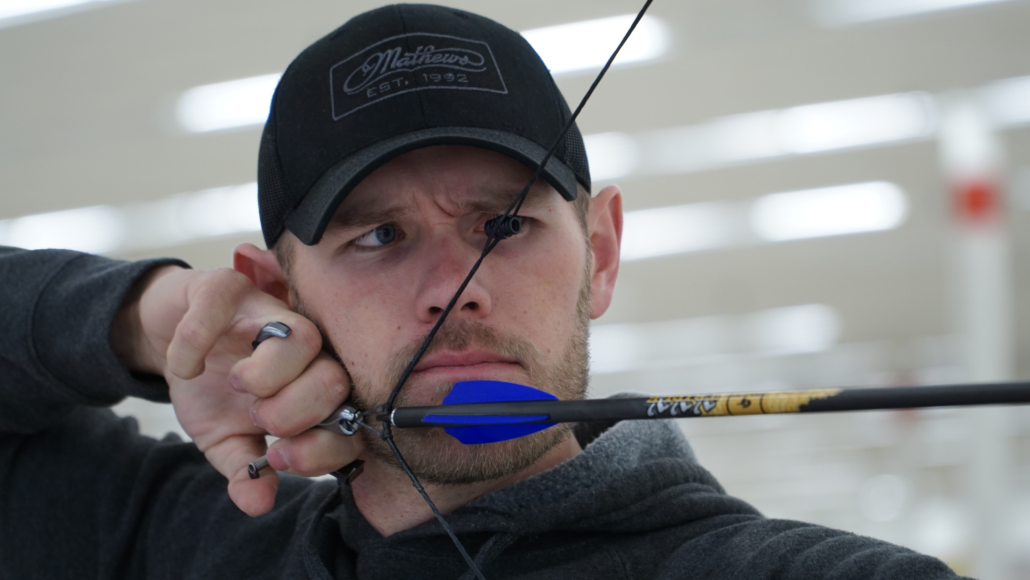
Having a consistent anchor point is critical to success. However, despite what many archers think, making it consistent involves more than just one thing. That is why I follow a three-point process: release-to-hand, hand-to-face, and string-to-face. By keeping all three repeatable, I’m able to have a more consistent shot.

Release-to-hand means keeping the release in the same spot in the hand during every shot. To do this, find a place that feels comfortable to you than consciously practice it until it becomes the only place that feels right. Marking this spot on your hand may even be beneficial in the beginning.

After your release-to-hand position is set, find a comfortable hand-to-face position. I personally recommend lightly touching your hand to the same place on your face every time. For me, this position is placing my knuckles along the jaw line.

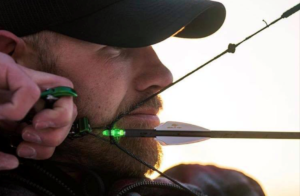
The third and final anchoring point to practice this summer is your string-to-face contact. I recommend lightly touching the string to your nose. This is one of the easiest places to anchor consistently, helping prevent slight movements that would otherwise be hard to trace along the face.

For a more in depth look at anchoring, you can read my three point anchor article here.

3. Back Tension Form

Summer is a perfect time to refine how you draw your bow. When it comes to this form, sometimes small changes can make significant differences. One of these changes may be how powerful your draw is. For example, one of the issues I’ve had with my draw in the past has been my use of the traditional “back tension” method. Although this was once necessary, with the modern technology found on bows, I’ve found that a powerful back tension draw is no longer relevant. In fact, too much of this “push and pull” can be the cause of inconsistencies.

Why is this? Because modern bows now have greater let off. This means that too much “push and pull” allows for too much force with nowhere to go.

For example, once you hit the “back wall”, your energy needs to be transferred somewhere else. This energy is often then transferred to your release arm, causing disparities in your shot consistency. That’s why if shot consistency is an issue for you, now is the time to try something different.

With the let off technology of newer bows, a less aggressive approach can be beneficial. Instead of using the traditional back tension method, try to relax during the motion instead. Use just enough muscle to get the string back to the stop. Then, let the bow do the rest.

This motion will requiring using less muscles, resulting in less fatigue. Remember, the more consistent you can be, the more accurate you will be.

Check out my full blog on back tension form here.

4. Grip

Torque is another cause of shot inconsistencies, and is something that should be improved upon this summer. To keep torque limited, I recommend gripping with only one muscle. This is achieved by sticking your thumb at the twelve o’clock position, then turn it to the two o’clock position while keeping the rest of your fingers tucked behind the grip. That way you are taking away the “life-line” of your hand. This reduces the chance of “over-gripping”, which is the cause of the torque.

It’s also critical to keep your grip “relaxed”. That’s why I recommend spending this summer consciously practicing a loose and minimal grip. That way it’s a subconscious response this fall.

Watch my video on the importance of your archery grip and torque here.

5. Mental Focus

Usual summer bow practice is the perfect time to prepare for stressful situations. Instead of calmly shooting in your backyard, try to ramp up the stress. These are the situations that cause your adrenaline to pump and make your knees weak. However, you might be wondering “how do you prepare for these stressful situations that you can’t replicate?” The answer is to subconsciously prepare for them.

To do this, it’s important to spend your time focusing on one small spot. By training yourself to do this, you’ll teach yourself to be more consistent no matter how hard your adrenaline is pumping. By learning how to focus on only a small spot this summer, you can learn how to subconsciously focus on only one small spot this fall. Being able to do this under stressful conditions will be critical to your success.

Read my advice on preparing your body, equipment, and especially your mind here.

6. Breathing

Something as simple as practicing your breath can help you execute a great shot when you need it the most. That’s why this summer is the perfect time to practice when to breathe. Learning when to breathe, and doing it repetitively, will be the key to keeping your composure come fall.

It is important to breath at the right moments. There are key times when I recommend breathing. First, I recommend breathing during the draw. Then, I make sure to take a final breath as the pin settles in, and hold that air in my lungs as I release the shot. It’s important to keep in mind that breathing too early will cause panic, while breathing at improper times will cause the pin to bounce. That’s why practicing breathing this summer will help you execute it subconsciously when you need it the most this fall.

Read my blog on breathing while shooting here.

7. Target Panic

This summer is a great time to combat target panic. Many archers will come down to the target and when they reach the middle, they will immediately fire the shot.

To improve this, I recommend taking two weeks this summer to practice aiming without ever firing a shot. In fact, I don’t even recommend that you put your finger on the trigger.

Instead, simply pull back, aim, and hold. When the shot starts deteriorating, let up and regroup. Do this fifty to sixty times a day for the next two weeks. Before you know it, that pin will sit there longer than before. This helps you keep your composure in the field, and reminds you that seeing your target doesn’t mean it’s the perfect time for a shot.

Here is a blog and video with a solution to beat target panic.

8. Thought Process

Just like everything else in this guide, having a consistent thought process is crucial for execution, especially when faced with buck fever. Although it’s always important to practice this process, summer is a perfect time to make this process better.

Everyone’s process is different. However, my thought process consists of a mental checklist. Here I focus on a single step of the process rather than the big situation. This means focusing on ranging and aiming, rather than releasing. By practicing the steps in this guide, the release ends up being a subconscious movement, and I won’t succumb to the pressure of buck fever.

9. Shot Timing

Accuracy is all about repeatability. Shot timing is no different. This means trying to keep the same amount of time between the anchor and the release. For me, this is a three to four second window from the time I “anchor” to when the release fires. Staying consistent with this time is crucial to keeping groups as consistent as possible.

Here is a video on my tips for archery shot timing.

10. Focus on Scenarios

After you’ve been consistently improving your shooting technique, I recommend spending some of your summer bow practice sessions focusing on each possible scenario you may be faced with. This means if you might be shooting sitting down, then practice from a seated position. If you are a spot and stalk hunter, then practice shooting from kneeling position. Consider practicing from different angles, different stands, and especially different distances. Utilize the consistencies you’ve built from focusing on the tips listed above, and put them to use in real world situations.

The Ultimate Goal

All of these points and archery tips have one goal: to help you become more consistent. As I’ve mentioned before, repetition is everything in archery and summer is the perfect time to make the smallest details consistent. Putting conscious effort into these details and practicing them consistently, will allow you to repeat them instinctively. This will assure you are going to perform at your best when you are faced with that buck of your dreams this fall.

How to Properly Anchor Your Bow: The 3 Point Process

Archery Tips | A Consistent Anchor Point

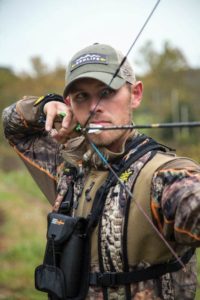
Whether it’s for competition or for hunting, a consistent anchor point is a crucial component to shooting your best. Accurate shooting is repetitive shooting, and to be repetitive, you need to have an archery form that you can repeat subconsciouslyThis means knowing how to properly anchor your bow. There are three main components when developing a consistent anchor point: release-to-hand contact, hand-to-face contact, and string-to-face contact.  All of three of these points are crucial in assuring repeatability in your form and becoming the best archer or bow hunter you can be.

Release-to-Hand

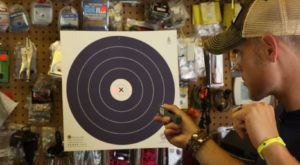
The first point to focus on is where the release sits within the hand. Altering this position can affect form, draw length, and subsequently, accuracy. That’s why finding and practicing with the release in only one position of the hand is crucial in your success as an archer.

There are two aspects to consider when finding the correct release-to-hand contact position.  These are comfort and consistency.  It is essential that your release of choice fits comfortably within your hand. Secondly, this comfortable position needs to be repeatable.  That’s why I recommend marking that comfortable spot, either with a marker or a piece of tape.  This will help you to assure that you place your release there every time, until it’s the only place comfortable place to do so.


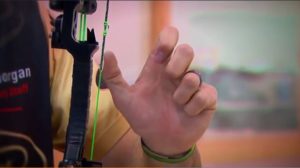
PhotoThe first point to focus on when developing a consistent anchor point is where the release sits within the hand. Altering this position can affect form, draw length, and subsequently, accuracy.

Hand-to-Face

Once you have the release in a comfortable position in your hand, you need to find a consistent position to mount your hand to your face. When doing this, it’s important to make actual contact without pushing too hard.  No contact makes it nearly impossible to be repetitive, while pushing too hard makes it difficult to execute the shot.

I personally use my first and middle knuckle and lightly anchor it against my jaw bone, avoiding excess pressure. This is both comfortable and easily repetitive.


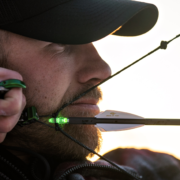
Photo: When it comes to hand-to-face contact, I personally use my first and middle knuckle and lightly anchor it against my jaw bone, avoiding excess pressure. This is both comfortable and easy to repeat.

String-to-Face

The third anchor position is “string-to-face”.  This is the position where the string makes contact with the face, which for most people, is the nose.  It’s common to touch the string either to the tip of the nose or to the side of the nose, and although there isn’t a right or wrong, I find one to be more consistent than the other.

Many archers will choose to anchor on the side of their nose, which is fine as long as they can keep it consistent. However, I find it difficult to make contact on the same spot every time. That’s why I personally use the tip of my nose.   

How much pressure you apply to your nose is important as well. Many hunters find themselves putting too much, or too little, pressure against their nose as well. That’s why I recommend very lightly touching the tip of the nose.  This leaves less room for error, and therefore improving shot consistency.
Consistency Matters

To be accurate is to be consistent. This means there isn’t a “right” or a “wrong” shooting form, but rather a form that is repeatable. To be repeatable, your gear needs to fit you correctly and your anchor position needs to become a habit. That’s why I recommend practicing consistent release-to-hand, hand-to-face, and string-to-face anchor points. The combination of these three components helps assure consistency in your overall form and therefore improve your performance as a hunter.

How Competition Archery has Made Me a Better Bow Hunter

Transitioning from Competitive Archery into Bow Hunting

Being competition shooter has no doubt made me a better hunter. Every week I compete, I’m faced with the same pressure I experience during that decisive moment of a hunt. The stress of shooting at a deer’s vitals is the same I experience trying to keep myself together when shooting that final arrow in competition. The level of preparation and mental toughness I’ve learned from being a professional archer has allowed me to excel under pressure when in the stand bow hunting.


Finding Gear 

Many people get caught up in gear brand and types, when they need to focus on fit. Finding the right gear, the basic process for competition shooting and bow hunting are the same: decide on the gear that fits you well.

Gear brand isn’t as critical as gear comfort. In today’s industry, most top end bow manufacturers make quality products. The key to shooting these quality products well is searching for brands that feel comfortable to you. When you shop, try every bow you can.  Put it in your hand, shoot it, and concentrate on how it feels.  It has to feel right to shoot right. 

Once you have equipment that feels right to you, you can balance and tune it with precision (paper tuning for example). A properly tuned bow creates a more forgiving shot in the field and the stand.  I have an entire video playlist on how to properly tune your bow and some top notch archery tips.

Proper Archery Form 

Target shooting has defined how I shoot. Whether you’re shooting at a deer, or shooting at a target, it’s important for you to be straight.  This means you should be in a straight line, feet shoulder width apart, with no leaning or tilting.  Your arm should be “straight relaxed”. However, despite understanding these basics of shooting a bow, I don’t want you to get caught up in the details. Why? Because I’ve been by guys that have a form that you would never find in an archery book. Whether you’re bow hunting or competing, there is no such thing as “perfect archery form” despite what many people have you believe.  In fact, there isn’t a right or a wrong form. Success simply depends on how repeatable your form is. 

Some of the best shooters in the industry don’t shoot by the “book”.  They simply have a process that they can follow time and time again. They know this process produces results, and it allows them to focus on simply aiming, rather than hitting their target.  

The same theory applies to bow hunting. If your form is repeatable, your shot will be repeatable when you need it the most. When you pull back on a deer, you shouldn’t be thinking about proper form, you should be thinking about aiming and the end result. This is crucial when developing your shooting process.

Develop a Process 

Developing a process is critical in competitive archery. Developing this type of process can improve anyone’s success when bow hunting. If all you’re thinking about is not messing up the shot, then you’re likely going to mess up the shot. That’s why you need to think about a single step of the process, and rely on your instincts to follow through with the rest.  

So how do you develop a repeatable process?  By breaking your goals into small steps.  You need to be able to think about each of these steps rather than focusing on the big situation (like not missing that deer). The right process is one where you think about aiming, and everything else just happens.


My shot process looks like this: 

  • When a deer is coming in, I only focus on ranging him.  By focusing on how far he is, my mind isn’t focused on the situation. This keeps the pressure under control. 
  • When I come to full draw all I focus on then is aiming. I literally tell myself time and time again to “just aim”.  You should never be focusing on firing that release.  The release should be a subconscious movement, your consciousness should be focused on aiming that pin.  

Below are a few drills I recommend to develop this shooting process: 

  • Aiming Without Firing an Arrow 

Hold it for as long as you can until your form starts to break down.  You learn to ease your mind and the anxiety when firing your shot.  You are also building your stamina. 

  • Blind Bailing 

This is where you walk up within 2 or 3 yards of a target and close your eyes.  Picture your pin being in the middle and practice firing over and over again. Learn what that surprise release feels like. Doing this will create a much more fluent shot.  

  • Long Range Shooting 

Shooting from a distance magnifies everything. That’s why long range shooting is my go to drill for competition and archery. If I need to shoot from 40 yards, then I’ll practice at 80.  Doing this magnifies any issues I might be having with my bow or my form.  This also makes shooting closer seem so much easier.

Handling Pressure 

Where target experience shines is when a person has to deal with pressure as a hunter.  There are many similarities between archery competitions and hunting situations, and pressure is a big one. With bow hunting, you’re faced with the pressure of “one shot”.  You have only one chance to execute this hunt.  With one mistake you could miss the deer and the opportunity will be over.  As a hunter, you may only experience this feeling a few times a year, so it can get the best of you.  

However, with competition archery you experience this feeling every week. You learn to excel when put in high stress situations week in and week out.  This constant pressure builds mental toughness. This is a toughness you can take to the stand. 

By practicing the tips above: finding a comfortable bow, properly tuning, developing a process, and practicing, you can overcome any target or buck pressure.  Remember to break your goal down into actionable steps that will allow you to focus on aiming, and not panicking, during the shot.  

Putting it Together  

Many hunters practice a few days before season, at twenty yards, and call it good.  However, that won’t result in a successful (or ethical) journey as a hunter.  It’s your responsibility to make the shot at your highest potential.  

Much of my success as a hunter comes from the time I put in as a tournament shooter.  As a hunter, it’s your job to put in time, every day, to assure you are successful as well.  I can’t emphasize enough the importance of learning how to develop a process and focusing on the individual tasks of that process. To do this, you need to create subconscious actions you can only achieve through practicing. Remember to reach your full potential, learn how to keep your mind on aiming at full draw and letting the process handle the rest. Then you’ll find success too.